Herbalist Dr MziziMkavu
Platinum Member
- Feb 3, 2009
- 43,114
- 34,956
In this guide I explain how to recover personal files from a broken laptop. I assume the hard drive is still in good working order.
For example, you can use this guide if the screen stopped working, motherboard failed, power jack stopped working properly, etc but it will not work if the hard drive itself failed (stopped spinning, makes grinding noise, clicking noise, etc )
Ill be retrieving data using an external USB enclosure for 2.5″ Â hard drives. Lets go though the process step by step.
STEP 1.
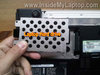
First of all, remove the hard drive from the hard drive. If the hard drive has mounting brackets or caddy youll have to separate them from the hard drive.

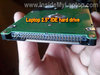
Most laptops use 2.5″ hard drives. Its either IDE or SATA hard drive and you will see the difference in the following pictures.
2.5″ IDE HARD DRIVE
The IDE hard drive connector has two rows of pins.

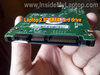
2.5″ SATA HARD DRIVE
The SATA hard drive has two flat connectors. One for data and one for power.
By the way, same type of connectors used in 3.5″ SATA desktop hard drives. It means you can connect a 2.5″ hard drive directly to a desktop PC using same cables.

STEP 2.
Purchase an external USB enclosure for 2.5″ hard drive.
If you have an IDE hard drive, youll have to purchase  an IDE enclosure.
If you have a SATA hard drive, youll have to purchase a SATA enclosure.
IDE and SATA enclosure are NOT interchangeable.
Ive been using NexStar enclosures for a while and find them very well designed and reliable but you can use any other brand too.
For IDE hard drives you can use this external NexStar 2.5″ IDE HDD enclosure.
For SATA hard drives you can use this external NexStar 2.5″ SATA HDD enclosure.

STEP 3.
Install your IDE or SATA hard drive into the enclosure.

STEP 4.
Connect the external USB enclosure to any working computer.
If there is no problem with the hard drive, it should be detected by the computer
automatically. The external hard dive will pop up in My Computer.
You should be able to access the external hard drive and transfer all needed files.

Windows XP, Vista and Windows 7 keep user files in different locations.
In Windows XP youll find user files in the following path:
C😀ocuments and SettingsUser Account
In Windows Vista and Windows 7 youll find user files in the following path:
C:UsersUser Account
Where C:s the main system drive. The external hard drive will have a different letter but the path to user files will remain the same.
Access is Denied error message
While accessing user files you can get Access is Denied error message. It happens because your user account on the broken laptop was password protected.
In order to get access to user files on the external hard drive youll have to take ownership over the user folder.
Heres how you can take ownership over the Users folder (if you had Windows Vista or Windows 7 installed) or Documents and Settings folder (if you have Windows XP installed).
STEP 1.
1. Access files located on the external hard drive and
- Right click on Users folder (if you had Windows Vista or Windows 7 installed)
or
-Right click on Documents and Settings folder (if you had Windows XP installed)
and after that click on properties.
2. Click on Security tab in User Properties windows.
3. Click on Advanced button.

STEP 2.
1. Click on Owner tab in Advanced Security Settings for Users window.
2. Click on Edit button.

STEP 3.
1. Left click on Administrators group.
2. Check the Replace owner on subcontainers and objects box.
3. Click OK button.

STEP 4.
Click Yes in Windows Security windows.

Process of taking ownership might take a long time, it depends on how many files you have in Users or Documents and Settings folders.
After its done, you should be able to get access to your files.
For example, you can use this guide if the screen stopped working, motherboard failed, power jack stopped working properly, etc but it will not work if the hard drive itself failed (stopped spinning, makes grinding noise, clicking noise, etc )
Ill be retrieving data using an external USB enclosure for 2.5″ Â hard drives. Lets go though the process step by step.
STEP 1.
First of all, remove the hard drive from the hard drive. If the hard drive has mounting brackets or caddy youll have to separate them from the hard drive.
Most laptops use 2.5″ hard drives. Its either IDE or SATA hard drive and you will see the difference in the following pictures.
2.5″ IDE HARD DRIVE
The IDE hard drive connector has two rows of pins.
2.5″ SATA HARD DRIVE
The SATA hard drive has two flat connectors. One for data and one for power.
By the way, same type of connectors used in 3.5″ SATA desktop hard drives. It means you can connect a 2.5″ hard drive directly to a desktop PC using same cables.
STEP 2.
Purchase an external USB enclosure for 2.5″ hard drive.
If you have an IDE hard drive, youll have to purchase  an IDE enclosure.
If you have a SATA hard drive, youll have to purchase a SATA enclosure.
IDE and SATA enclosure are NOT interchangeable.
Ive been using NexStar enclosures for a while and find them very well designed and reliable but you can use any other brand too.
For IDE hard drives you can use this external NexStar 2.5″ IDE HDD enclosure.
For SATA hard drives you can use this external NexStar 2.5″ SATA HDD enclosure.
STEP 3.
Install your IDE or SATA hard drive into the enclosure.
STEP 4.
Connect the external USB enclosure to any working computer.
If there is no problem with the hard drive, it should be detected by the computer
automatically. The external hard dive will pop up in My Computer.
You should be able to access the external hard drive and transfer all needed files.
Windows XP, Vista and Windows 7 keep user files in different locations.
In Windows XP youll find user files in the following path:
C😀ocuments and SettingsUser Account
In Windows Vista and Windows 7 youll find user files in the following path:
C:UsersUser Account
Where C:s the main system drive. The external hard drive will have a different letter but the path to user files will remain the same.
Access is Denied error message
While accessing user files you can get Access is Denied error message. It happens because your user account on the broken laptop was password protected.
In order to get access to user files on the external hard drive youll have to take ownership over the user folder.
Heres how you can take ownership over the Users folder (if you had Windows Vista or Windows 7 installed) or Documents and Settings folder (if you have Windows XP installed).
STEP 1.
1. Access files located on the external hard drive and
- Right click on Users folder (if you had Windows Vista or Windows 7 installed)
or
-Right click on Documents and Settings folder (if you had Windows XP installed)
and after that click on properties.
2. Click on Security tab in User Properties windows.
3. Click on Advanced button.
STEP 2.
1. Click on Owner tab in Advanced Security Settings for Users window.
2. Click on Edit button.
STEP 3.
1. Left click on Administrators group.
2. Check the Replace owner on subcontainers and objects box.
3. Click OK button.
STEP 4.
Click Yes in Windows Security windows.
Process of taking ownership might take a long time, it depends on how many files you have in Users or Documents and Settings folders.
After its done, you should be able to get access to your files.