whatsapp on ipad...i beg ur help plz
You are using an out of date browser. It may not display this or other websites correctly.
You should upgrade or use an alternative browser.
You should upgrade or use an alternative browser.
whatsapp on ipad...i beg ur help plz
- Thread starter whizzkid
- Start date


Brakelyn
JF-Expert Member
- Oct 6, 2009
- 1,181
- 522
iPad ngapi na ina IOS ngapi? unaweza kuInstal baada ya kuJailbreak au bila kuJailbreak. fuatilia haya maelezo kama umeJailbreak iPad yako.Naomba msaada juu ya kudownload whatsapp kny ipad, nmejaribu nmeshindwa.
Step 1: Download and install the iPhone Configuration Utility from the links given below.
Step 2: Connect your iPad with your Mac or PC.
Step 3: Download WhatsApp for iPhone on your PC or Mac using iTunes.
Step 4: Now launch the iPhone Configuration Utility. On the left hand side, you will see your connected iPad; click on it.
Step 5: Click on Applications from the tabs you see at the top of your screen.
Step 6: Click on Add at the top left and browse for the WhatsApp IPA file you download in Step 3. It can be found under the iTunes Media > Mobile Applications folder.
Step 7: Scroll down and click on Install. WhatsApp will appear on your iPad's Springboard.
Step 8: On your iPad, open up Cydia and install WhatsPad tweak from the BigBoss repository.
Once the WhatsPad tweak has been installed, you may launch the WhatsApp app from your homescreen and it will work the way it works on your iPhone. Also keep in mind that WhatsApp will ask you to enter a 3-digit PIN for activation which you'll receive in a text message, therefore be sure to activate WhatsApp using your active phone number on which you can receive text messages in order to get the PIN.
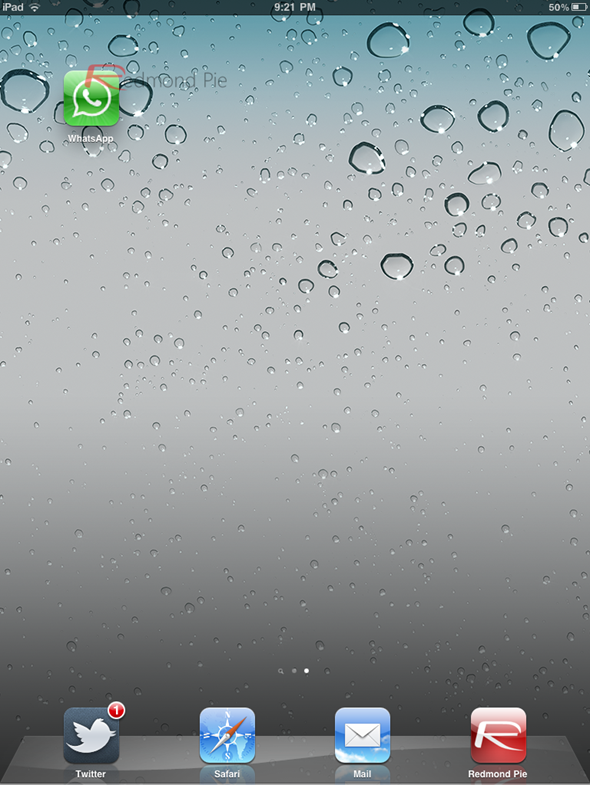
If you want to scale it up and take the advantage of every pixel of the iPad's screen real estate, you can do that as well by downloading one of the many well-known tweaks from Cydia, such as RetinaPad or FullForce.
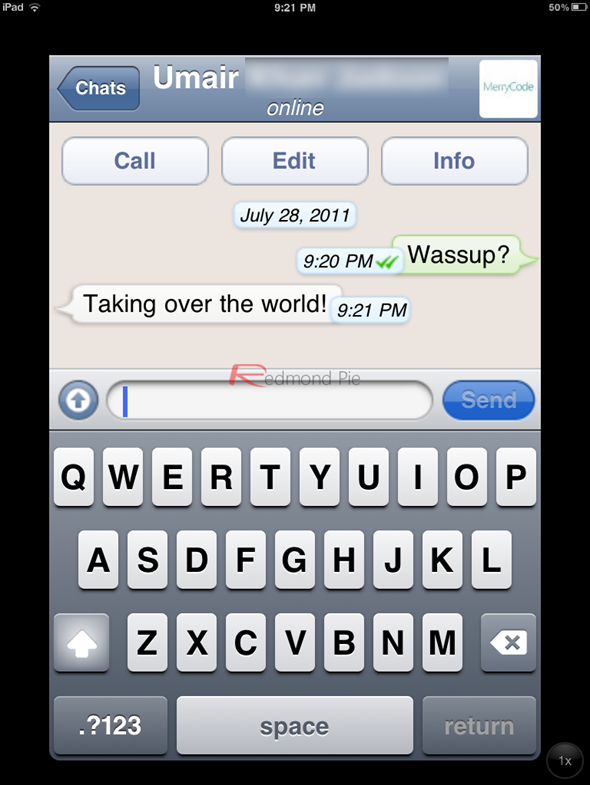
While we previously stated that WhatsPad only works for WiFi+3G iPad models, we can confirm – from the developer himself – that the tweaks allows WhatsApp to run on all iPad models.
Brakelyn
JF-Expert Member
- Oct 6, 2009
- 1,181
- 522
[h=1]Install WhatsApp On iPod Touch and iPad Without Jailbreak[/h]All you need is iPhone Configuration utility and iTunes.
Download iTunes For Windows and Mac
Download iPhone Configuration utility for Windows and Mac
WhatsApp iPad – Whatsapp iPod Touch – Steps
1. Open your iTunes and looks for the App that is not compactable with your iPod Touch or iPad
2. Install and open the iPhone Configuration utility before that make sure you connected your iPod or iPad to Windows PC or Mac

3. Check on the left panel on iPhone configuration utility.
Click on application, Add file and locate the .ipa file you want to add or simply drag and drop the .ipa file to iPhone configuration utility
You can Locate the .ipa at the following path
For Mac user
/Music/iTunes/iTunes Media/Mobile Application
For Windows user
C:\Users\USER\Music\iTunes\iTunes Media\Mobile Applications
Note : The paths mentioned above are default ones, if you changed the path them check the .ipa file there.

4. Check for Devices on the left panel on iPhone configuration utility and make sure your iPod or iPad is listed.
Click on your device and go to application. A list of applications will will shown and in our case you can see Install button next to wahts app. Click on it and allow few seconds
Give it some time it will be installed on your deice and you will see the uninstall button next to the app installed.


5. Now you can enjoy whatsapp on your iPod Touch or iPad. You can also do the same for other apps to make it force install if its not compatible with your iPod Touch or iPad


Hope you enjoy whatsapp iPad without jailbreak and also on iPod touch
We noticed that many users got kAMDRecieveMessageError Here is a solution to fix it..
Download iTunes For Windows and Mac
Download iPhone Configuration utility for Windows and Mac
WhatsApp iPad – Whatsapp iPod Touch – Steps
1. Open your iTunes and looks for the App that is not compactable with your iPod Touch or iPad
2. Install and open the iPhone Configuration utility before that make sure you connected your iPod or iPad to Windows PC or Mac

3. Check on the left panel on iPhone configuration utility.
Click on application, Add file and locate the .ipa file you want to add or simply drag and drop the .ipa file to iPhone configuration utility
You can Locate the .ipa at the following path
For Mac user
/Music/iTunes/iTunes Media/Mobile Application
For Windows user
C:\Users\USER\Music\iTunes\iTunes Media\Mobile Applications
Note : The paths mentioned above are default ones, if you changed the path them check the .ipa file there.

4. Check for Devices on the left panel on iPhone configuration utility and make sure your iPod or iPad is listed.
Click on your device and go to application. A list of applications will will shown and in our case you can see Install button next to wahts app. Click on it and allow few seconds
Give it some time it will be installed on your deice and you will see the uninstall button next to the app installed.


5. Now you can enjoy whatsapp on your iPod Touch or iPad. You can also do the same for other apps to make it force install if its not compatible with your iPod Touch or iPad


We noticed that many users got kAMDRecieveMessageError Here is a solution to fix it..

Njunwa Wamavoko
JF-Expert Member
- Aug 11, 2012
- 5,757
- 2,388

IamError_D
JF-Expert Member
- Dec 21, 2011
- 441
- 117
Brakelyn
JF-Expert Member
- Oct 6, 2009
- 1,181
- 522
umetumia njia ya kuJailbreak au ya bila kuJailbreak? njia ya kuJailbreak ndio rahisi kwasababu utaInstal hiyo whatspad tweak itafanya kila kitu..Mkuu Brakelyn nimefata maelekezo yako nimefanikiwa kuweka Whatsapp kwenye ipad inayo sapoti iOS 5 na above lakini inaniletea ujumbe SORRY YOUR DEVICE IS CURRENTLY NOT SUPPORTED. Ipad yangu inatumia iOS 5.x
Brakelyn
JF-Expert Member
- Oct 6, 2009
- 1,181
- 522
ukitumia njia ya kuJailbreak itakuwa rahisi sababu hautahitaji kuwa na iPhone pembeni kwaajili ya kuActivate. otherwise kama hutaki kuJailbreak itabidi utafute iPhone alafu ufanye step hizi..Mkuu Brakelyn nimefata maelekezo yako nimefanikiwa kuweka Whatsapp kwenye ipad inayo sapoti iOS 5 na above lakini inaniletea ujumbe SORRY YOUR DEVICE IS CURRENTLY NOT SUPPORTED. Ipad yangu inatumia iOS 5.x
[h=1]HOW TO ACTIVATE WHATSAPP ON IPAD OR IPOD[/h]

We have showed you how to install Whatsapp on iPad and iPod in the previous post. But in order for it to work, you have to activate the Whatsapp account.
To install Whatsapp on iPad or iPod, please click on this guide : How to install Whatsapp on iPad or iPod without jailbreak.
We have separated the guide into two parts on installing and activating in order to avoid confusion when the guide became too long. So once you have installed Whatsapp on your iPad or iPod, you would be prompted by an error message as shown above, ‘Sorry, your device is currently not supported'. Do not worry with the message. Whatsapp is not officially launched for iPad and iPod, but by following the step by step guide below, you would be able to start whatsapp-ing from your iPad or iPod.
[h=2]STEP BY STEP GUIDE TO ACTIVATING WHATSAPP ON IPAD AND IPOD WITHOUT JAILBREAK[/h]
[h=3]Step 1[/h]If you have followed through the first guide on 'How to install Whatsapp on iPad or iPod wihout jailbreak' you would have ifunbox installed on your PC. If not, download ifunbox and install it on your PC.
[h=3]Step 2[/h]Get an iPhone and uninstall Whatsapp from the device. Yes, uninstall it so that you can do a fresh install with proper activation on the iPhone later.
[h=3]Step 3[/h]Install Whatsapp on iPhone, open the app and activate using the mobile number that you will be using in Whatsapp on your iPad or iPod.
[h=3]Step 4[/h]Connect the iPhone to your PC and open ifunbox. Select ‘iFunBox Classic' and on the left side click on ‘User Applications' under the iPhone. Select ‘Whatsapp' from the list, then once the files appear, select both ‘Documents' and ‘Library' folder. Then click on ‘Copy To PC' to save the selected folders on your PC.

[h=3]Step 5[/h]Disconnect iPhone from the PC and connect your iPad or iPod. Select ‘iFunBox Classic' again and on the left side click on ‘User Applications' under the iPad or iPod. Select ‘Whatsapp' from the list, then once the files appear, select both ‘Documents' and ‘Library' folder. Then paste it into the Whatsapp folder as shown below.

[h=3]Step 6[/h]Disconnect your iPad or iPod from the PC and you should have a working Whatsapp on your device.
If you still get the error message ‘Sorry, your device is currently not supported', delete the application and try again from Step 4. Enjoy Whatsapp on your iPad and iPod without jailbreaking it.
[h=3]Devices supported[/h]This will work on other iOS devices and here's a list of iOS devices supported :
- iPod touch (1st to 5th gen)
- iPad Wifi
- iPad Wifi + 3G
- iPad 2 Wifi
- iPad 2 Wifi + 3G
- iPad (3rd gen) Wifi
- iPad (3rd gen) Wifi + Cellular
- iPad (4th gen) Wifi
- iPad (4th gen) Wifi + Cellular
- iPad Air Wifi
- iPad Air Wifi + Cellular
- iPad Mini Wifi
- iPad Mini Wifi + Cellular
- iPad Mini Retina Wifi
- iPad Mini Retina Wifi + Cellular
Njunwa Wamavoko
JF-Expert Member
- Aug 11, 2012
- 5,757
- 2,388
Ntaweza je kupata apple acc bila Credit card?

KAJICHO KIVULI
JF-Expert Member
- Jul 30, 2013
- 2,061
- 547

mkalenda
JF-Expert Member
- Jul 10, 2013
- 290
- 23
Ntaweza je kupata apple acc bila Credit card?
Unaweza kabiksa mkuu,,
Njunwa Wamavoko
JF-Expert Member
- Aug 11, 2012
- 5,757
- 2,388
Unaweza kabiksa mkuu,,
Kaka niliuliza ntaweza je?
Hivo haukunipa jibu stahili
mkalenda
JF-Expert Member
- Jul 10, 2013
- 290
- 23
Kaka niliuliza ntaweza je?
Hivo haukunipa jibu stahili[/
What you'll need:
A computer with internet access iTunes installed on it
A valid email address
Open the Apple ID page on Apple's site and choose 'Create new Apple ID'. Register for a new account with a valid email address. This is important because you'll need to confirm this address later. Once you're ready with providing Apple the information it requires, hit 'Create Apple ID' at the bottom of the page.
Unless you've forgotten to fill out any of the required fields, you should be taken to a page that lets you know that it is time to verify your email address. Open up your email inbox and find the email that you just got from Apple. Note that there might be a couple of them, and one contains a 'Verify Now >' link that you need to click.
After clicking on the said link, you'll be taken to a confirmation page, acknowledging the verification of your email address.
Launch iTunes and if you're already signed in using a different account, make sure you sign out of it. Then while on the home screen, scroll down to the very bottom of the page. On the right side there should be a list of links under a 'Manage' tab. Choose 'Redeem'. Then a pop-up window will ask for your Apple ID and password.
Log in using the Apple ID you just created in step 1. You should get a notification saying that your account is not ready to be used yet and that your info has to be reviewed. On the next page you'll be asked to provide some more information, including the details for your credit card. Select the 'None' option.
NOTE: This 'None' option may not appear unless you follow the procedure as we're describing it in this how-to guide. Hit 'Continue' and you should be all set.
Your newly-created Apple ID should be now ready to be used on an iPhone or an iPad. Log in from your device and enjoy Apple's rich library of iOS software. Questions or comments? The section below is all yours!
Njunwa Wamavoko
JF-Expert Member
- Aug 11, 2012
- 5,757
- 2,388
Kaka niliuliza ntaweza je?
Hivo haukunipa jibu stahili[/
What you'll need:
A computer with internet access iTunes installed on it
A valid email address
Open the Apple ID page on Apple's site and choose 'Create new Apple ID'. Register for a new account with a valid email address. This is important because you'll need to confirm this address later. Once you're ready with providing Apple the information it requires, hit 'Create Apple ID' at the bottom of the page.
Unless you've forgotten to fill out any of the required fields, you should be taken to a page that lets you know that it is time to verify your email address. Open up your email inbox and find the email that you just got from Apple. Note that there might be a couple of them, and one contains a 'Verify Now >' link that you need to click.
After clicking on the said link, you'll be taken to a confirmation page, acknowledging the verification of your email address.
Launch iTunes and if you're already signed in using a different account, make sure you sign out of it. Then while on the home screen, scroll down to the very bottom of the page. On the right side there should be a list of links under a 'Manage' tab. Choose 'Redeem'. Then a pop-up window will ask for your Apple ID and password.
Log in using the Apple ID you just created in step 1. You should get a notification saying that your account is not ready to be used yet and that your info has to be reviewed. On the next page you'll be asked to provide some more information, including the details for your credit card. Select the 'None' option.
NOTE: This 'None' option may not appear unless you follow the procedure as we're describing it in this how-to guide. Hit 'Continue' and you should be all set.
Your newly-created Apple ID should be now ready to be used on an iPhone or an iPad. Log in from your device and enjoy Apple's rich library of iOS software. Questions or comments? The section below is all yours!
Kaka uki sign up wanakuomba credit card
Ndo kitu nachotaka kujua je ntaweza je kutumia apple store bila credit card au ntaweza je kuoata apple ID bila credit card?.
mkalenda
JF-Expert Member
- Jul 10, 2013
- 290
- 23
Kaka niliuliza ntaweza je?
Hivo haukunipa jibu stahili[/
What you'll need:
A computer with internet access iTunes installed on it
A valid email address
Open the Apple ID page on Apple's site and choose 'Create new Apple ID'. Register for a new account with a valid email address. This is important because you'll need to confirm this address later. Once you're ready with providing Apple the information it requires, hit 'Create Apple ID' at the bottom of the page.
Unless you've forgotten to fill out any of the required fields, you should be taken to a page that lets you know that it is time to verify your email address. Open up your email inbox and find the email that you just got from Apple. Note that there might be a couple of them, and one contains a 'Verify Now >' link that you need to click.
After clicking on the said link, you'll be taken to a confirmation page, acknowledging the verification of your email address.
Launch iTunes and if you're already signed in using a different account, make sure you sign out of it. Then while on the home screen, scroll down to the very bottom of the page. On the right side there should be a list of links under a 'Manage' tab. Choose 'Redeem'. Then a pop-up window will ask for your Apple ID and password.
Log in using the Apple ID you just created in step 1. You should get a notification saying that your account is not ready to be used yet and that your info has to be reviewed. On the next page you'll be asked to provide some more information, including the details for your credit card. Select the 'None' option.
NOTE: This 'None' option may not appear unless you follow the procedure as we're describing it in this how-to guide. Hit 'Continue' and you should be all set.
Your newly-created Apple ID should be now ready to be used on an iPhone or an iPad. Log in from your device and enjoy Apple's rich library of iOS software. Questions or comments? The section below is all yours!
Mkuu, hiyo njia ikishindikana kuna plan b
Ingia kwenye itune 9 or 10, then tafuta app yoyote ujalibu kuinstall itakuomba apple id, inapokuomba apple id kuna sehemu wameandika create new id, chagua hapo then endelea KWA mbele itakuomba uchague aina ya card chagua sehemu ya NON ambayo hutoweka detail zozote, ikishindikana nijuze
mkalenda
JF-Expert Member
- Jul 10, 2013
- 290
- 23
Kaka uki sign up wanakuomba credit card
Ndo kitu nachotaka kujua je ntaweza je kutumia apple store bila credit card au ntaweza je kuoata apple ID bila credit card?.
Ok, Tumia plan B
Njunwa Wamavoko
JF-Expert Member
- Aug 11, 2012
- 5,757
- 2,388
Ok, Tumia plan B
Asante kaka hii ndo inakubali lkn inamaana kama sina pc siwez acess store...
Ndo maana nikauliza ili kama kuna ujanja wa ku bypass ile ya card niweze kufanya

Dennis Tesha
Member
- Jun 7, 2012
- 16
- 23
Wadau mwenyewe nina Ipad2+3G with WiFi mwaka unakwisha sasa nimeshindwa kuinstall WhatsApp.
Similar Discussions
-
 Meta yashtakiwa Mahakamani kwa madai ya kusoma mazungumzo ya WhatsApp na kuvunja faragha
- Started by Mwanamwana
- Replies: 3
-
 Jinsi Social Media Inavyochangia Tech Culture Tanzania
- Started by Isaka James
- Replies: 1
-