Herbalist Dr MziziMkavu
JF-Expert Member
- Feb 3, 2009
- 43,044
- 34,771
One or more keys fell off the laptop keyboard and you are not sure how to put them back? Dont worry, most likely you can fix the keyboard and its not necessary to buy a new one. There is no universal repair guide because all keyboards are different. Heres what I usually do in this case.
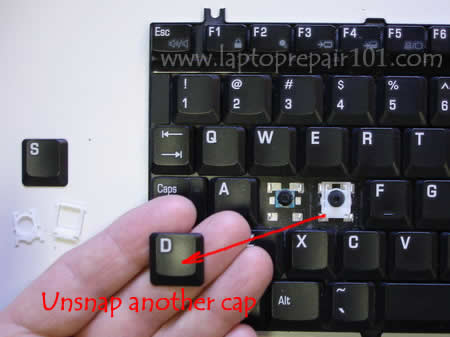
Situation 1. The key cap and key retainer fell off the keyboard and you cannot figure out how to assemble them back.

Missing a key? Search for laptop keys at www.replacementlaptopkeys.com
Carefully remove the cap from any other working key so the key retainer stays connected to the keyboard.
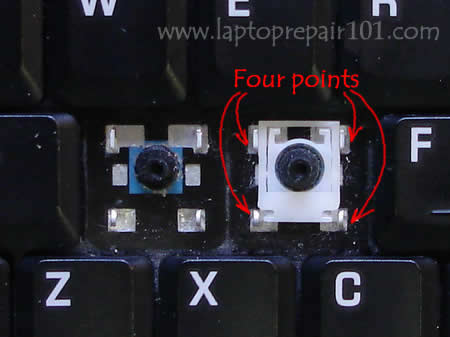
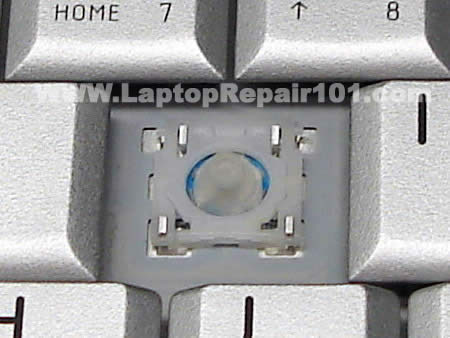
Take a closer look at the key retainer, its connected to the keyboard at four different points.
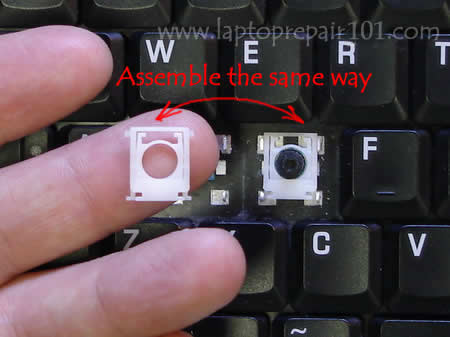
Assemble the disconnected retainer the same way as one on the keyboard and put it back in place.
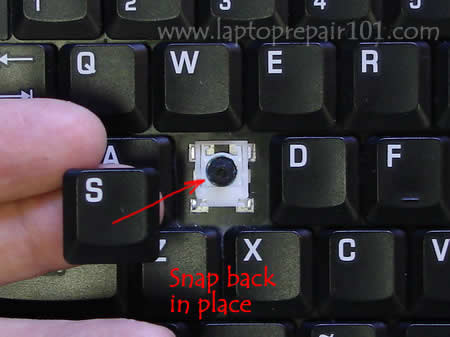
Put the key cap on the retainer and snap the cap back in place.
Situation 2. The key fell off the keyboard and you lost the cap or the retainer. In this case you can purchase a single key here, just search for it. (Search examples: Dell keyboard key, Toshiba keyboard key, HP keyboard key, etc )
After you found a new key, put it back in place the same way as I described in the situation 1.
Installing the space bar key.
The space bar key is connected to the keyboard a little bit differently then any other key.
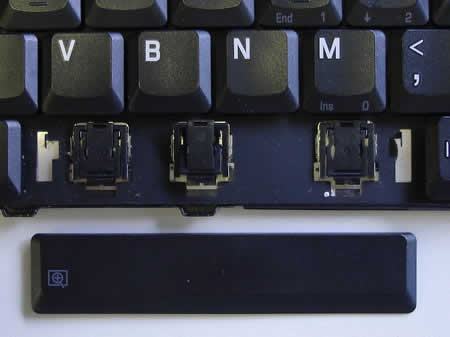
There is a metal retainer connected to the space bar key (on some keyboard models). Separate the retainer from the space bar key with a flat head screwdriver.

Install the retainer back in place as it shown on the picture. You have to engage the retainer with the small hooks on the keyboard.
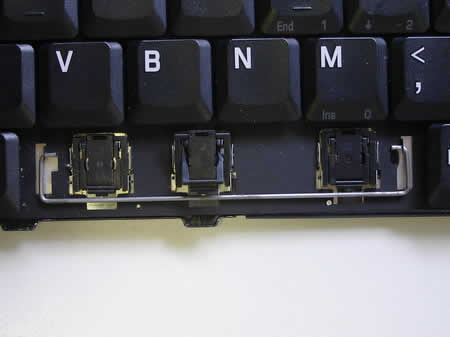
Put the space bar key back in place and gently press on it with fingers until it snaps back in place.

Thats it. The space bar key is installed back in place and should work as before. If you still cannot fix your keyboard, then youll have to find a new one and replace it.
Heres another technique you can use to fix a broken keyboard key.
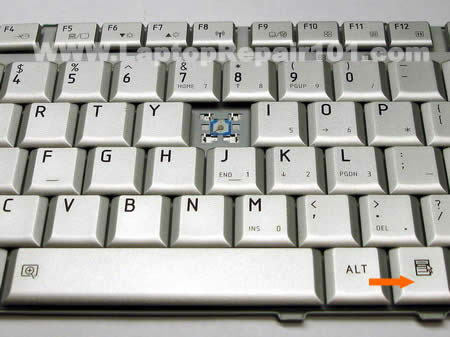
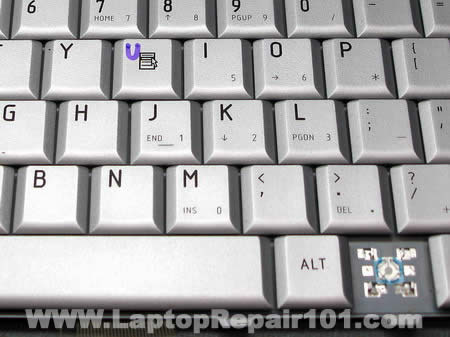
As you see on the picture below the keyboard is missing the U key. The key cap, retainer and even silicone membrane were lost. Lets see if its possible to temporarily fix the U key without buying any spare parts.
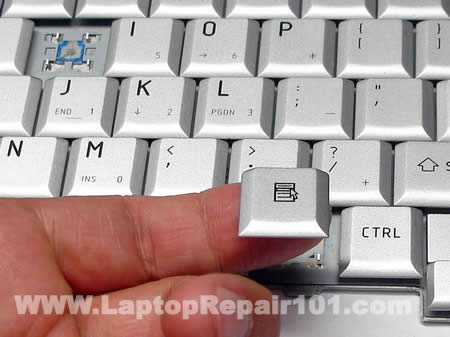
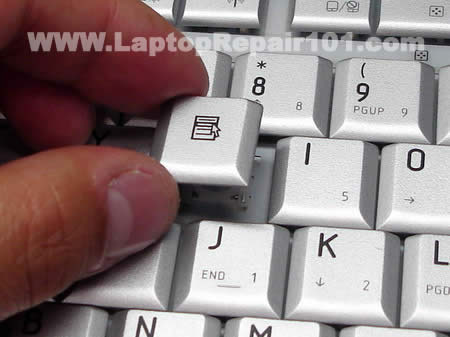
Personally, I cannot use keyboard without U key but I can live without a key located on the side from the right ALT the Right clicker key. In the following guide I will remove one key I never use and install it in the place of missing U.
Carefully remove the key cap with your fingers.
Remove the retainer. The retainer has two pieces connected to each other. If one piece got disconnected from the other, connect them back together.

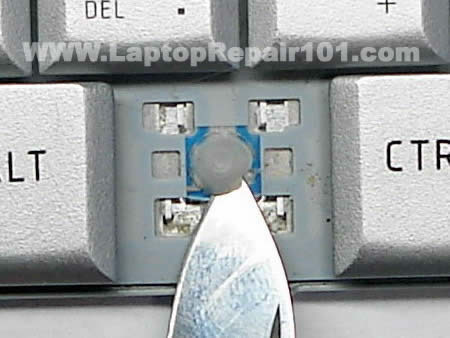
The silicon membrane is glued to the keyboard. Very very slowly separate the membrane from the keyboard with a sharp knife. While creating this disassembly guide I damaged one membrane because I wasnt careful enough.
Again, you have to be very careful removing the membrane.
If you damage the membrane youll end up with two broken keys instead of just one.
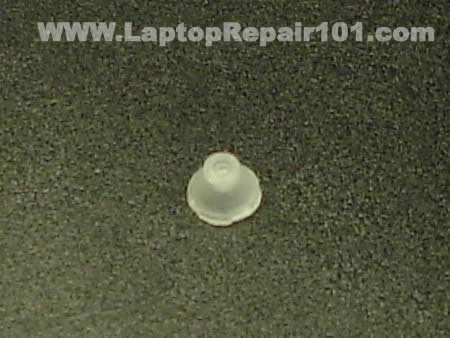
The silicon membrane has been removed.
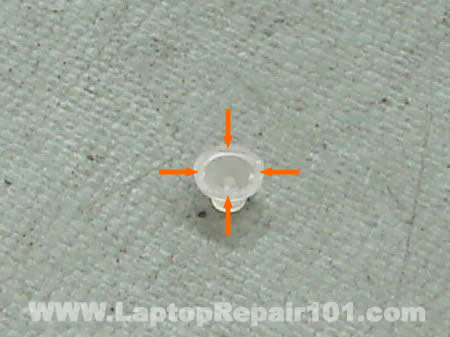
Now apply some superglue on the bottom edge of the membrane, just enough to keep the membrane in the place.
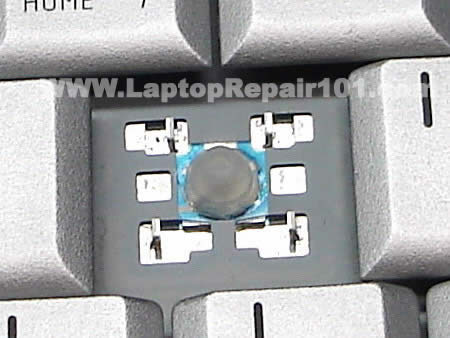
Carefully place the membrane in the center of the U. Make sure the membrane is positioned correctly. Wait until the glue cures.
Install the retainer.
Position the key cap above the retainer. Gently press on the key cap until it clips in and connects to the retainer.
Now you can use the U key again.
Troubleshooting. Why the key will not clip on.
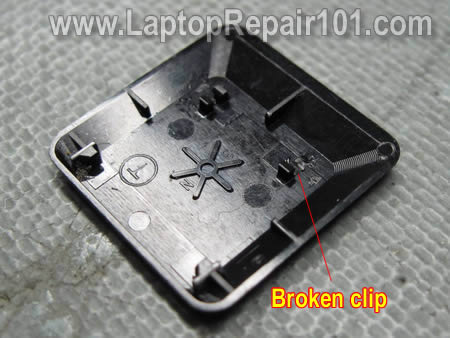
Turn the key upside down and take a closer look at the locking clips. Its possible that one of the clips is damaged and because of that the key will not clip on the retainer. If thats the case, youll have to purchase a new key.
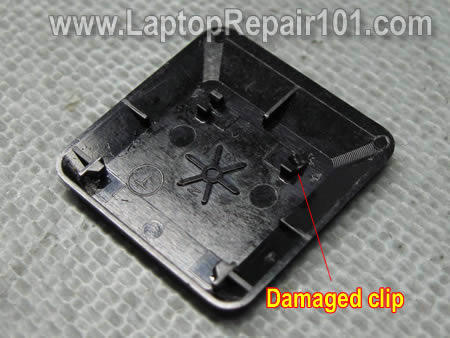
On the next picture you can see that one of the clips is missing, its broken. This key will not stay connected to the retainer either. If thats the case, youll have to purchase a new key.
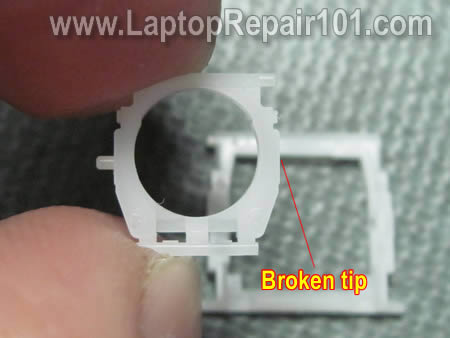
Its possible that the key is fine, but the retainer itself is broken. On the next picture you can see that one of the tips is missing on the retainer. The left tip is OK, but the right one is missing. If thats the case, youll have to purchase a new retainer.

Heres one more picture. In this case two parts of the retainer will not stay connected to each other. It happens because one of the tips is broken. The left tip is OK, but the right one is missing. If thats the case, youll have to purchase a new retainer.
If you find this article useful, please consider making a donation to the author. Thank you!