Using command prompt "attrib" to check for Viruses or Malware

Herbalist Dr MziziMkavu

JF-Expert Member
Feb 3, 2009
42,316
33,125
Microsoft Command Prompt "attrib" is a very useful tool to check if your hard drives even your flashdisks have been infected by a virus.
You will know if a Malware is inside your hard drive just by looking at the attributes of each files and the file that has the attributes of +s +h +r


The function of attrib is to set and remove file attributes (read-only, archive,system and hidden).


Launch attrib

To start attrib
  1. Go to Start Menu > Run
  2. Type cmd (cmd stands for command prompt)
  3. Press Enter key
The Command Prompt will appear showing us where is our location in the directory.


526822_f520.jpg

command prompt showing the current location in the directory


Using attrib

To use attrib
  1. Go to the root directory first by typing cd\(because this is always the target of Malware / Virus)
2. Type attrib and press Enter key


526849_f520.jpg

after typing attrib, all the attributes of all the files (excluding folders) will be shown


  • Benefits of Rooting your Android PhoneI recently purchased an HTC Wildfire phone and I must say this is one of the coolest phone (in terms of budget and features) out there.. - 3 months ago
  • Spanish Galleon AndaluciaThe Spanish Galleon Andalucia visited the beautiful island of bohol from October 23-26,2010. -11 months ago
  • Uchiha Sasuke Team HebiHebi (means snake) is a group of specialized shinobi created by Uchiha Sasuke having one goal in mind, and that is to kill his brother Uchiha Itachi. - 11 months ago
In this example, I have two files that are considered as malware.

Note that there are two files which I outlined in red (SilentSoftech.exe and autorun.inf). Since you cannot see this file nor delete it (because the attributes that was set on these files are +s +h +r)
  1. +s - meaning it is a system file (which also means that you cannot delete it just by using the delete command)
  2. +h - means it is hidden (so you cannot delete it)
  3. +r - means it is a read only file ( which also means that you cannot delete it just by using the delete command)
Now we need to set the attributes of autorun.inf to -s -h -r (so that we can manually delete it)
  1. Type attrib -s -h -r autorun.inf ( be sure to include -s -h -r because you cannot change the attributes using only -s or -h or -r alone)
  2. Type attrib again to check if your changes have been commited
  3. If the autorun.inf file has no more attributes, you can now delete it by typingdel autorun.inf
  4. Since SilentSoftech.exe is a malware you can remove its attributes by doing step 1 and step 3(just change the filename) ex. attrib -s -h -r silentsoftech.exe


526870_f520.jpg

a) I typed the attrib command with the -s -h -r setting b) the result after I pressed enter - autorun.inf has no attributes left


There you have it!!!!
NOTE : when autorun.inf keeps coming back even if you already deleted it, be sure to check your Task Manager by pressing CTRL + ALT + DELETE ( a virus is still running as a process thats why you cannot delete it. KILL the process first byselecting it and clicking End Process.
NOTE: You can also apply the attrib -s -h -r command to all the partition of your computer, drive D: drive E: drive F: (all of your drives). For example. for drive D, just type "D:" (minus the double quote) then you can see that your current drive is D.. type there the command "attrib -s -h -r *.exe" for exe files and "attrib -s -h -r *.inf" and then delete the file by "del autorun.inf".
Hope this helps!!!!! :)
 
[h=1]Attrib[/h]
Displays, sets, or removes the read-only, archive, system, and hidden attributes assigned to files or directories. Used without parameters, attrib displays attributes of all files in the current directory.
[h=2]Syntax[/h]attrib [{+r|-r}] [{+a|-a}] [{+s|-s}] [{+h|-h}] [[Drive:][Path] FileName] [/s[/d]]
Top of page
[h=2]Parameters[/h]+r: Sets the read-only file attribute.
-r : Clears the read-only file attribute.
+a : Sets the archive file attribute.
-a : Clears the archive file attribute.
+s : Sets the system file attribute.
-s : Clears the system file attribute.
+h : Sets the hidden file attribute.
-h : Clears the hidden file attribute.
[Drive:][Path] FileName: Specifies the location and name of the directory, file, or set of files for which you want to display or change attributes. You can use wildcard characters (that is, ? and *) in the FileName parameter to display or change the attributes for a group of files.
/s: Applies attrib and any command-line options to matching files in the current directory and all of its subdirectories.
/d: Applies attrib and any command-line options to directories.
/?: Displays help at the command prompt.
Top of page
[h=2]Remarks[/h]
•Working with groups of files
You can use wildcard characters (that is, ? and *) with the FileName parameter to display or change the attributes for a group of files. If a file has the system or hidden attribute set, you must clear these attributes before you can change any other attributes for that file.
•Using the archive attribute
The archive attribute (that is, +a) marks files that have changed since the last time they were backed up. The xcopy command uses archive attributes. For more information about archive attributes and xcopy, see Related Topics.
•The attrib command, with different parameters, is available from the Recovery Console.
Top of page
[h=2]Examples[/h]To display the attributes of a file named News86 located on the current drive, type:
attrib news86
To assign the read-only attribute to the file named Report.txt, type:
attrib +r report.txt
To remove the read-only attribute from files in the \Public\Jones directory on a disk in drive B and from files in any subdirectories of \Public\Jones, type:
attrib -r b:\public\jones\*.* /s
Consider a scenario where you want to give an associate a disk containing all files in the default directory on a disk in drive A, except files with the .bak extension. Because you can use xcopy to copy only those files marked with the archive attribute, you need to set the archive attribute for those files you want to copy. First, you need to set the archive attribute for all files on drive A. Second, you need to clear the archive attribute for those files with the .bak extension. For example, type:
attrib +a a:*.* attrib -a a:*.bak
Next, use xcopy to copy the files from the disk in drive A to the disk in drive B. The /a command-line option in the following command causes xcopy to copy only those files marked with the archive attribute. For example, type:
xcopy a: b: /a
If you want xcopy to clear each file's archive attribute after it copies the files, use the /m command-line option instead of /a. For example, type:
xcopy a: b: /m
Top of page
[h=2]Formatting legend[/h]
FormatMeaning
Italic
Information that the user must supply
Bold
Elements that the user must type exactly as shown
Ellipsis (...)
Parameter that can be repeated several times in a command line
Between brackets ([])
Optional items
Between braces ({}); choices separated by pipe (|). Example: {even|odd}
Set of choices from which the user must choose only one
Courier font
Code or program output

Command-line reference A-Z
 
Using Chkdsk

Creates and displays a status report for the disk. The chkdsk command also lists and corrects errors on the disk.
The chkdsk command with the parameters listed below is only available when you are using the Recovery Console The chkdsk command with different parameters is available from the command prompt.

chkdsk
[drive:] [/p] [/r]

Parameters

none
Used without parameters, chkdsk displays the status of the disk in the current drive.
drive :
Specifies the drive that you want chkdsk to check.
/p
Performs an exhaustive check even if the drive is not marked for chkdsk to run. This parameter does not make any changes to the drive.
/r
Locates bad sectors and recovers readable information. Implies /p.
Note
  • The chkdsk command requires the file Autochk.exe. If it cannot find it in the startup directory (\%systemroot%\System32, by default), it will attempt to locate it on the Windows Installation CD. If you have a multiboot computer, be sure you are issuing this command from the drive containing Windows.
 
Bootcfg

Configures, queries, or changes Boot.ini file settings.
To view the command syntax, click a command:
bootcfg addsw
Adds operating system load options for a specified operating system entry.
Syntax

bootcfg /addsw [/s Computer [/u Domain\User /p Password]] [/mm MaximumRAM] [/bv] [/so] [/ng] /id OSEntryLineNum
Top of page

Parameters

/s Computer : Specifies the name or IP address of a remote computer (do not use backslashes). The default is the local computer.
/u Domain \ User : Runs the command with the account permissions of the user specified by User or Domain\User. The default is the permissions of the current logged on user on the computer issuing the command.
/p Password : Specifies the password of the user account that is specified in the /u parameter.

/mm
MaximumRAM : Adds the /maxmem switch to the specified OSEntryLineNum and sets the maximum amount of

RAM that the operating system can use.

/bv
: Adds the /basevideo switch to the specified OSEntryLineNum, directing the operating system to use standard VGA mode for the installed video driver.

/so
: Adds the /sos switch to the specified OSEntryLineNum, directing the operating system to display device driver names while they are being loaded.

/ng
: Adds the /noguiboot switch to the specified OSEntryLineNum, disabling the Windows XP Professional progress bar that appears before the CTRL+ALT+DEL logon prompt.

/id
OSEntryLineNum : Specifies the operating system entry line number in the [operating systems] section of the Boot.ini file to which the operating system load options are added. The first line after the [operating systems] section header is 1.
/? : Displays help at the command prompt.
Top of page

Examples

The following examples show how you can use the bootcfg /addsw command:
bootcfg /addsw /mm 64 /id 2
bootcfg /addsw /so /id 3
bootcfg /addsw /so /ng /s srvmain /u hiropln /id 2
bootcfg /addsw /ng /id 2
bootcfg /addsw /mm 96 /ng /s srvmain /u maindom\hiropln /p p@ssW23 /id 2

bootcfg copy
Makes another operating system instance copy, for which switches can be added.

Syntax

bootcfg /copy [/s Computer [/u Domain\User /p Password]] [/d Description] [/id OSEntryLineNum]


Parameters

/s Computer : Specifies the name or IP address of a remote computer (do not use backslashes). The default is the local computer.

/u
Domain \ User : Runs the command with the account permissions of the user specified by User or Domain\User. The default is the permissions of the current logged on user on the computer issuing the command.

/p
Password : Specifies the password of the user account that is specified in the /u parameter.

/d
Description : Specifies the description for the new operating system entry.

/id
OSEntryLineNum : Specifies the operating system entry line number in the [operating systems] section of the Boot.ini file to copy. The first line after the [operating systems] section header is 1.

/?
: Displays help at the command prompt.

Examples

The following examples show how you can use the bootcfg /copy command:
bootcfg /copy /d "\ABC Server\" /id 1
bootcfg /copy /s srvmain /u maindom\hiropln /p p@ssW23 /d "Windows XP" /id 2
bootcfg /copy /u hiropln /p p@ssW23 /d "AB Ver 1.001" /id 2
bootcfg dbg1394
Configures 1394 port debugging for a specified operating system entry.


Syntax

bootcfg /dbg1394 {ON|OFF|EDIT} [/s Computer [/u Domain\User /p Password]] [/ch channel] /id OSEntryLineNum


Parameters

ON | OFF | EDIT : Specifies the value for 1394 port debugging.
ONEnables remote debugging support by adding the /dbg1394 switch to the specified OSEntryLineNum.
OFFDisables remote debugging support by removing the /dbg1394 switch from the specified OSEntryLineNum.
EDITAllows changes to port and baud rate settings by changing the channel values associated with the /dbg1394 switch for the specifiedOSEntryLineNum.


/s Computer : Specifies the name or IP address of a remote computer (do not use backslashes). The default is the local computer.

/u
Domain \ User : Runs the command with the account permissions of the user specified by User or Domain\User. The default is the permissions of the current logged on user on the computer issuing the command.

/p
Password : Specifies the password of the user account that is specified in the /u parameter.

/ch
channel : Specifies the channel to use for debugging. Valid values are integers between 1 and 64. Do not use the /ch channel parameter if 1394 port debugging is being disabled.

/id
OSEntryLineNum : Specifies the operating system entry line number in the [operating systems] section of the Boot.ini file to which the 1394 port debugging options are added. The first line after the [operating systems] section header is 1.
/? : Displays help at the command prompt.


Examples

The following examples show how you can use the bootcfg /dbg1394 command:
bootcfg /dbg1394 /id 2
bootcfg /dbg1394 on /ch 1 /id 3
bootcfg /dbg1394 edit /ch 8 /id 2
bootcfg /s srvmain /u maindom\hiropln /p p@ssW23 /dbg1394 off /id 2
bootcfg debug
Adds or changes the debug settings for a specified operating system entry.

Syntax

bootcfg /debug {ON|OFF|EDIT} [/s Computer [/u Domain\User /p Password]] [/port {COM1|COM2|COM3|COM4}] [/baud{9600|19200|38400|57600|115200}] [/id OSEntryLineNum]


Parameters

ON | OFF | EDIT : Specifies the value for debugging.
ONEnables remote debugging support by adding the /debug switch to the specified OSEntryLineNum.
OFFDisables remote debugging support by removing the /debug switch from the specified OSEntryLineNum.
EDITAllows changes to port and baud rate settings by changing the values associated with the /debug switch for the specified OSEntryLineNum.


/s Computer : Specifies the name or IP address of a remote computer (do not use backslashes). The default is the local computer.
/u Domain \ User : Runs the command with the account permissions of the user specified by User or Domain\User. The default is the permissions of the current logged on user on the computer issuing the command.
/p Password : Specifies the password of the user account that is specified in the /u parameter.
/port { COM1 | COM2 | COM3 | COM4 } : Specifies the COM port to be used for debugging. Do not use the /port parameter if debugging is being disabled.
/baud { 9600 | 19200 | 38400 | 57600 | 115200 } : Specifies the baud rate to be used for debugging. Do not use the /baud parameter if debugging is being disabled.
/id OSEntryLineNum : Specifies the operating system entry line number in the [operating systems] section of the Boot.ini file to which the debugging options are added. The first line after the [operating systems] section header is 1.
/? : Displays help at the command prompt.


Remarks
  • If 1394 port debugging is required, use bootcfg /dbg1394.
Examples

The following examples show how you can use the bootcfg /debug command:
bootcfg /debug on /port com1 /id 2
bootcfg /debug edit /port com2 /baud 19200 /id 2
bootcfg /s srvmain /u maindom\hiropln /p p@ssW23 /debug off /id 2
bootcfg default
Specifies the operating system entry to designate as the default.


Syntax

bootcfg /default [/s Computer [/u Domain\User /p Password]] [/id OSEntryLineNum]


Parameters

/s Computer : Specifies the name or IP address of a remote computer (do not use backslashes). The default is the local computer.
/u Domain \ User : Runs the command with the account permissions of the user specified by User or Domain\User. The default is the permissions of the current logged on user on the computer issuing the command.
/p Password : Specifies the password of the user account that is specified in the /u parameter.
/id OSEntryLineNum : Specifies the operating system entry line number in the [operating systems] section of the Boot.ini file to designate as default. The first line after the [operating systems] section header is 1.
/? : Displays help at the command prompt.


Examples

The following examples show how you can use the bootcfg /default command:
bootcfg /default /id 2
bootcfg /default /s srvmain /u maindom\hiropln /p p@ssW23 /id 2
bootcfg delete
Deletes an operating system entry in the [operating systems] section of the Boot.ini file.


Syntax

bootcfg /delete [/s Computer [/u Domain\User /p Password]] [/id OSEntryLineNum]


Parameters

/s Computer : Specifies the name or IP address of a remote computer (do not use backslashes). The default is the local computer.
/u Domain \ User : Runs the command with the account permissions of the user specified by User or Domain\User. The default is the permissions of the current logged on user on the computer issuing the command.
/p Password : Specifies the password of the user account that is specified in the /u parameter.
/id OSEntryLineNum : Specifies the operating system entry line number in the [operating systems] section of the Boot.ini file to delete. The first line after the [operating systems] section header is 1.
/? : Displays help at the command prompt.


Examples

The following examples show how you can use the bootcfg /delete command:
bootcfg /delete /id 1
bootcfg /delete /s srvmain /u maindom\hiropln /p p@ssW23 /id 3
bootcfg ems
Enables the user to add or change the settings for redirection of the EMS console to a remote computer. By enabling EMS, you add a "redirect=Port#" line to the [boot loader] section of the Boot.ini file and a /redirect switch to the specified operating system entry line. The EMS feature is enabled only on servers.


Syntax

bootcfg /ems {ON|OFF|EDIT} [/s Computer [/u Domain\User /p Password]] [/port {COM1|COM2|COM3|COM4|BIOSSET}] [/baud{9600|19200|38400|57600|115200}] [/id OSEntryLineNum]


Parameters

ON | OFF | EDIT : Specifies the value for EMS redirection.
ONEnables remote output for the specified OSEntryLineNum. Adds a /redirect switch to the specified OSEntryLineNum and a redirect=comX setting to the [boot loader] section. The value of comX is set by the /port parameter.
OFFDisables output to a remote computer. Removes the /redirect switch from the specified OSEntryLineNum and the redirect=comX setting from the [boot loader] section.
EDITAllows changes to port settings by changing the redirect=comX setting in the [boot loader] section. The value of comX is reset to the value specified by the /port parameter.


/s Computer : Specifies the name or IP address of a remote computer (do not use backslashes). The default is the local computer.

/u
Domain \ User : Runs the command with the account permissions of the user specified by User or Domain\User. The default is the permissions of the current logged on user on the computer issuing the command.

/p
Password : Specifies the password of the user account that is specified in the /u parameter.

/port
{ COM1 | COM2 | COM3 | COM4 | BIOSSET } : Specifies the COM port to be used for redirection. BIOSSET directs EMS to get the BIOS settings to determine which port should be used for redirection. Do not use the /port parameter if remotely administered output is being disabled.

/baud
{ 9600 | 19200 | 38400 | 57600 | 115200 } : Specifies the baud rate to be used for redirection. Do not use the /baud parameter if remotely administered output is being disabled.

/id
OSEntryLineNum : Specifies the operating system entry line number to which the EMS option is added in the [operating systems] section of the Boot.ini file. The first line after the [operating systems] section header is 1. This parameter is required when the EMS value is set to ON or OFF.
/? : Displays help at the command prompt.


Remarks
  • For more information on the Emergency Management Services (EMS), see Help and Support Center.
Examples

The following examples show how you can use the bootcfg /ems command:
bootcfg /ems on /port com1 /baud 19200 /id 2
bootcfg /ems on /port biosset /id 3
bootcfg /s srvmain /ems off /id 2
bootcfg /ems edit /port com2 /baud 115200
bootcfg /s srvmain /u maindom\hiropln /p p@ssW23 /ems off /id 2
bootcfg query
Queries and displays the [boot loader] and [operating systems] section entries from Boot.ini.


Syntax

bootcfg /query [/s Computer [/u Domain\User /p Password]]


Parameters

/s Computer : Specifies the name or IP address of a remote computer (do not use backslashes). The default is the local computer.
/u Domain \ User : Runs the command with the account permissions of the user specified by User or Domain\User. The default is the permissions of the current logged on user on the computer issuing the command.
/p Password : Specifies the password of the user account that is specified in the /u parameter.
/? : Displays help at the command prompt.


Remarks
  • The following is a sample of bootcfg /query output:

    Boot Loader Settings--------------------timeout: 30default: multi(0)disk(0)rdisk(0)partition(1)\WINDOWSBoot Entries------------Boot entry ID: 1Friendly Name: "Microsoft Windows XP Professional"Path: multi(0)disk(0)rdisk(0)partition(1)\WINDOWSOS Load Options: /fastdetect /debug /debugport=com1:
  • The Boot Loader Settings portion of the bootcfg query output displays each entry in the [boot loader] section of Boot.ini.
  • The Boot Entries portion of the bootcfg query output displays the following detail for each operating system entry in the [operating systems] section of Boot.ini: Boot entry ID, Friendly Name, Path, and OS Load Options.
Examples

The following examples show how you can use the bootcfg /query command:
bootcfg /query
bootcfg /query /s srvmain /u maindom\hiropln /p p@ssW23
bootcfg /query /u hiropln /p p@ssW23
bootcfg raw
Adds operating system load options specified as a string to an operating system entry in the [operating systems] section of the Boot.ini file.

Syntax

bootcfg [/s Computer [/u Domain\User /p Password]] /raw OSLoadOptionsString [/id OSEntryLineNum]


Parameters

/s Computer : Specifies the name or IP address of a remote computer (do not use backslashes). The default is the local computer.
/u Domain \ User : Runs the command with the account permissions of the user specified by User or Domain\User. The default is the permissions of the current logged on user on the computer issuing the command.
/p Password : Specifies the password of the user account that is specified in the /u parameter.
OSLoadOptionsString : Specifies the operating system load options to add to the operating system entry. These load options will replace any existing load options associated with the operating system entry. No validation of OSLoadOptions is done.
/id OSEntryLineNum : Specifies the operating system entry line number in the [operating systems] section of the Boot.ini file to update. The first line after the [operating systems] section header is 1.
/? : Displays help at the command prompt.


Remarks
  • Bootcfg raw is used to add text to the end of an operating system entry, overwriting any existing operating system entry options. This text should contain valid OS Load Options such as /debug, /fastdetect, /nodebug, /baudrate, /crashdebug, and /sos. For example, the following command adds "/debug /fastdetect" to the end of the first operating system entry, replacing any previous operating system entry options:
    bootcfg /raw "/debug /fastdetect" /id 1
  • For more information about optional OS Load Options and how Windows uses the Boot.ini file during startup, see article 170756, "Available Switch Options for Windows NT Boot.ini File," in the Microsoft Knowledge Base.
Examples

The following examples show how you can use the bootcfg /raw command:
bootcfg /raw "/debug /sos" /id 2
bootcfg /raw /s srvmain /u maindom\hiropln /p p@ssW23 "/crashdebug " /id 2
bootcfg rmsw
Removes operating system load options for a specified operating system entry.

Syntax

bootcfg /rmsw [/s Computer [/u Domain\User /p Password]] [/mm] [/bv] [/so] [/ng] /id OSEntryLineNum


Parameters

/s Computer : Specifies the name or IP address of a remote computer (do not use backslashes). The default is the local computer.
/u Domain \ User : Runs the command with the account permissions of the user specified by User or Domain\User. The default is the permissions of the current logged on user on the computer issuing the command

/p
Password : Specifies the password of the user account that is specified in the /u parameter.

/mm
: Removes the /maxmem switch and its associated maximum memory value from the specified OSEntryLineNum. The /maxmem switch specifies the maximum amount of RAM that the operating system can use.

/bv
: Removes the /basevideo switch from the specified OSEntryLineNum. The /basevideo switch directs the operating system to use standard VGA mode for the installed video driver.

/so
: Removes the /sos switch from the specified OSEntryLineNum. The /sos switch directs the operating system to display device driver names while they are being loaded.

/ng
: Removes the /noguiboot switch from the specified OSEntryLineNum. The /noguiboot switch disables the Windows XP Professional progress bar that appears before the CTRL+ALT+DEL logon prompt.

/id
OSEntryLineNum : Specifies the operating system entry line number in the [operating systems] section of the Boot.ini file from which the OS Load Options are removed. The first line after the [operating systems] section header is 1.
/? : Displays help at the command prompt.

Examples

The following examples show how you can use the bootcfg /rmsw command:
bootcfg /rmsw /mm 64 /id 2
bootcfg /rmsw /so /id 3
bootcfg /rmsw /so /ng /s srvmain /u hiropln /id 2
bootcfg /rmsw /ng /id 2
bootcfg /rmsw /mm 96 /ng /s srvmain /u maindom\hiropln /p p@ssW23 /id 2
bootcfg timeout
Changes the operating system time-out value.


Syntax

bootcfg /timeout TimeOutValue [/s Computer [/u Domain\User /p Password]]

Parameters

TimeOutValue : Specifies the timeout value in the [boot loader] section. The value is the number of seconds the user has to select an operating system from the boot loader screen before NTLDR loads the default. If the value is 0, then NTLDR immediately starts the default operating system without displaying the boot loader screen.

/s
Computer : Specifies the name or IP address of a remote computer (do not use backslashes). The default is the local computer.

/u
Domain \ User : Runs the command with the account permissions of the user specified by User or Domain\User. The default is the permissions of the current logged on user on the computer issuing the command.

/p
Password : Specifies the password of the user account that is specified in the /u parameter.
/? : Displays help at the command prompt.


Examples

The following examples show how you can use the bootcfg /timeout command:
bootcfg /timeout 30
bootcfg /s srvmain /u maindom\hiropln /p p@ssW23 /timeout 50


Formatting legend

ItalicInformation that the user must supply
BoldElements that the user must type exactly as shown
Ellipsis (...)Parameter that can be repeated several times in a command line
Between brackets ([])Optional items
Between braces ({}); choices separated by pipe (|). Example: {even|odd}Set of choices from which the user must choose only one
Courier fontCode or program output


How to remove Bar311.exe Shuts down a PC Virus


I was plagued by this virus once in our Computer Laboratory and searching google was my first option... i searched google but solutions are vague or incomplete but I finally managed to find the correct solution.
so, I would like to share it to you hoping that this will aid you in vanquishing bar311..


524884_f260.jpg


Symptoms when infected by Bar311.exe or Winzip123

The virus comprises bar311.exe, password_viewer.exe, photos.zip.exe and pc-off.bat.
When you boot your Windows XP in Safe Mode the message appears: Thank You!!! Password:Winzip123
The pc-off.bat contains the syntax like this"C:/path/shutdown -s -f -t 2 -c" which automatically shutdown your computer when you run the cmd.exe.


Manual Removal of Bar311.exe

1. Go to Task Manager by pressing CTRL+ALT+DEL then kill (end process) password_viewer.exe or bar311.exe or photos.zip.exe...
2. EDIT the following registry entries thru Regedit


How to access Regedit?
  1. Go to Start Menu > Run
  2. Type Regedit and Press Enter key

Just follow the directory and click the folder...[HKEY_LOCAL_MACHINE\SOFTWARE\Microsoft\Windows NT\CurrentVersion\Winlogon] "Userinit"="userinit.exe,bar311.exe" -> remove ", bar311.exe" only...
>leave userinit.exe because this is used by Windows when you log-in...

[HKEY_CURRENT_USER\Software\Microsoft\Windows\ CurrentVersion\Explorer\Advanced]
"Hidden"=dword:00000001
"HideFileExt"=dword:00000000
"ShowSuperHidden"=dword:00000001

HKEY_CURRENT_USER\Software\Microsoft\Command Processor] "autorun"="c:\Windows\pc-off.bat" -> remove "c:\Windows\pc-off.bat" or delete the autorun key.

3. go to your thumb drive, please use the folders view in the explorer and use the navigation panel on the left side when accessing the drives to avoid triggering the autorun... then delete autorun.inf and password_viewer.exe or bar311.exe
4. open notepad then type what is shown below as is...

@echo off del /a /f c:\Windows\bar311.exe
del /a /f c:\Windows\password_viewer.exe
del /a /f c:\Windows\photos.zip.exe
del /a /f c:\Windows\pc-off.bat
pause


then save this as remove.bat then double click to run


Hope this helps!!!!
No, it doesn't help squat!

Kwa nini nikariri mikurasa ishirini ya command line wakati kuna antivirus applications zinazorun hayo ma commandline?
 
No, it doesn't help squat!

Kwa nini nikariri mikurasa ishirini ya command line wakati kuna antivirus applications zinazorun hayo ma commandline?
Kuna Antivirus nyingi haziwezi kuondowa Virus. kwa mfano kamamunapata messege hii
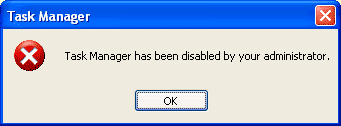
(Error Message: "Task Manager has been disabled by your administrator" ) hakuna Anti-Virus ikaweza kuiondowa hiyo Virus iliyozuia Task Manager isiweze kufanya kazi je waweza kuiondowa hiyo virus? nikutumie?


taskmanagerdisabled.gif
 

Similar Discussions

Back
Top Bottom