Herbalist Dr MziziMkavu
JF-Expert Member
- Feb 3, 2009
- 42,299
- 33,082
Windows 8 recovery options
I have decided to be a news fanboy and start writing articles about new features implemented in the upcoming Windows 8. Pretty much everyone is doing it, so you may see a bit of regurgitated tech lingo here and there, although I will try to be both funny and original, while maintaining utter professionalism and keeping you informed. What more, I am sort of a Linux guy, which makes the me the best person to give you an objective report on the state of the new Windows.
Seriously, there are lots of interesting things coming in Windows 8 that we should talk about. Some are definitely overplayed, like the security, most of which you have already seen in my Windows 7 articles, one and two, but we might have another sequel. Then, there's the supposedly improved boot process, but that's for later. A new filesystem? Yes, please. Personalization, safe mode? Sure, we will discuss those, too. Today, we will focus on the new refresh/reset feature.

What is the refresh/reset?
The choice of words might be a bit tricky, but essentially, Microsoft want to make life easier for average users by giving them an option that OEM have been doing for years with Windows-based laptops - an ability to reset the system to factory settings, so to speak.
More advanced users will probably not be using the built-in system recovery mechanisms, as imaging sounds like a more flexible, more useful option. But then, even they might get lazy and choose the new stuff.
The two functions are available under Recovery in the Control Panel, using either the new interface or the old interface. However, you can only run them from within Windows if you have the Metro interface enabled, so please be aware of that. Now, this is nothing sinister, because you can toggle Metro on and off with a single registry key change and one login, no reboot required. Alternatively, you will need to fire up the recovery console during the boot and invoke the necessary functionality. You can also pop in the installation DVD and repair your system. The options are many and varied.
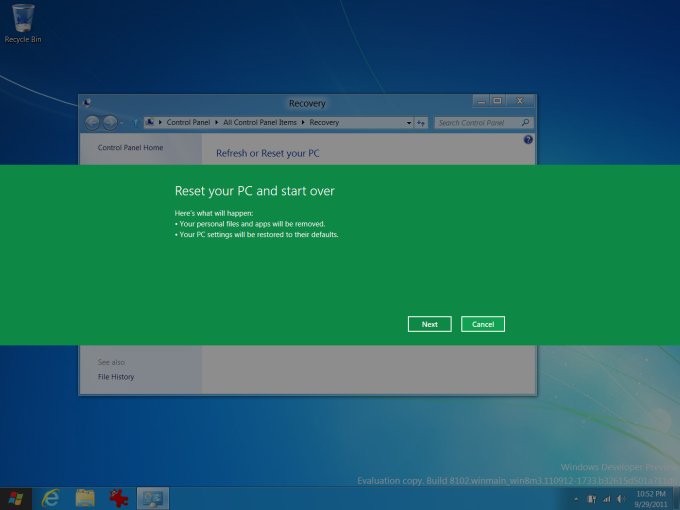
So let's open that menu. Let me show you both the new and classic Control Panel:


Refresh
Refresh is similar to booting into safe mode and trying to repair your Windows, using the sfc command on Windows XP, inserting your CD and then letting Windows fix corrupted system files by copying from the disc, or by using the recovery console in Windows 7, which then accesses the 100MB hidden partition where core system files are saved for emergency. Refresh is all of these combined.
It will let you reload core system files from its backup. Personal data will not be touched, although there is no guarantee that the repair process will work. So you are advised to keep your stuff on a separate partition and have a sound backup procedure in place. Imaging your system is also a wise choice, especially since you have a plenty of useful tools available, all for free. Lots of links on imaging further below.
You will lose programs installed manually. All your settings and tweaks will also be restored to default. So please think twice before you permanently refresh your system.


Reset
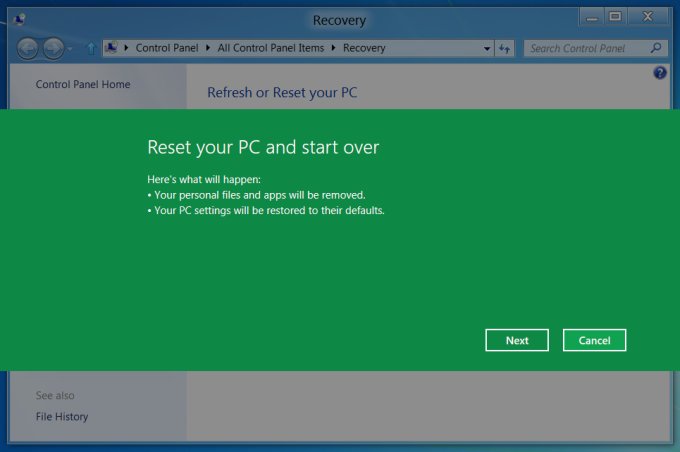
Reset is a more stringent operation. It is designed to truly reset your system to factory defaults, which, in this case, might be either a preinstalled setup or your own manual installation. Either way, you will lose all of your data and the system will go back to its pristine, fresh state.
This kind of operation might be desirable if you plan on giving away your machine with Windows installed, but you fear there might be traces and leftovers of personal data stored somewhere. Now, technically speaking, your data will still be there on the disk, only not accessible by the regular means of browsing using the Windows Explorer. So if you are keen on privacy, then you might want to consider a low-level format. We will have a separate discussion on this one soon.


What to choose? And when?
Now, the tough decision. Normally, if you are practicing safe and sane computing and do not abuse your system, you will probably never need to execute the Refresh option. In fact, you won't need ever fight BSOD, boot into safe mode, use the recovery console one way or another, or even invoke the system restore. All this assuming you behave.
If bad things happen, restoring your machine to a state that might have existed two years back or so could be painful. And the time you will need to get all your programs back might be equal to starting fresh and reinstalling from scratch. So you might be better of with system imaging, executed periodically before big changes.
The Reset sounds more useful, because it is more final. This is the kind of thing you will do when you no longer expect to continue running your system, so there should be fewer doubts about what might happen. Just remember that physical data might remain stored on the disk.
In action
Does this really work? Well, let's see. In my case, I deliberately borked a virtual machine, messing up the display by using incompatible 3D features in VirtualBox, which caused my test image to stop being usable. Then, I loaded the recovery console and started playing.
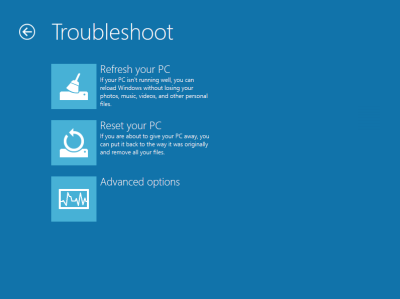
You will notice the new style and colors used. In all previous versions, Windows used a more classic recovery console. Here, it's inline with the new theme. The two dominant options are Refresh and Reset, but you can also do all the other things.

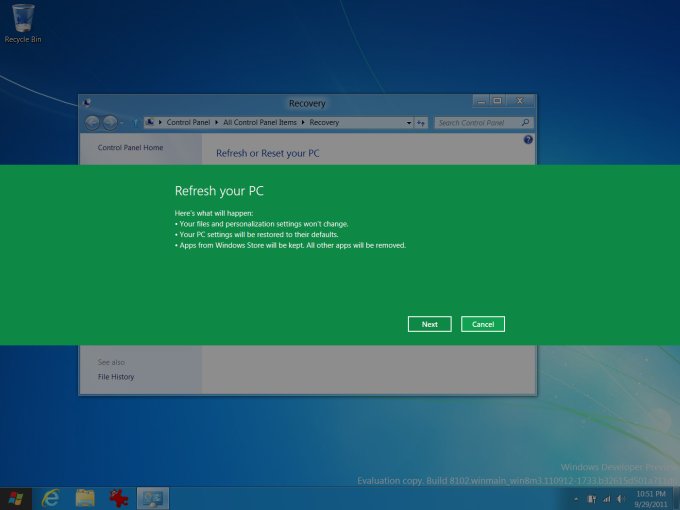
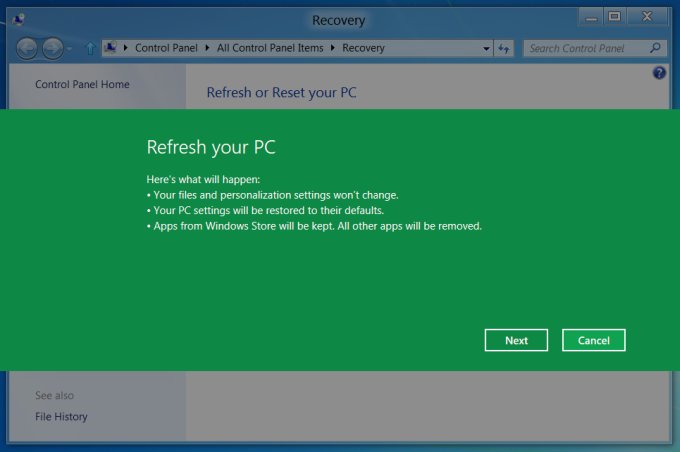
Since our system is no longer functioning, but we still supposedly need our data, we will try refreshing the host. This means we ought to go back to default system settings, with our personal stuff still intact. Windows Store apps will be kept, which is a nice thing.

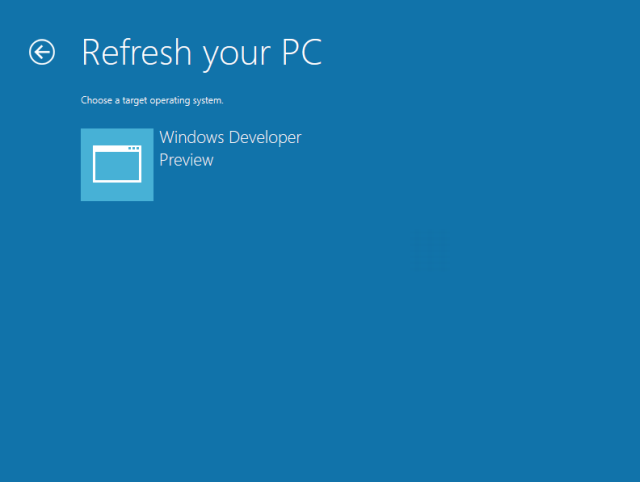
Your next step is to choose the target, if you have more than one instance of the Windows operating system capable of being refreshed installed on your disk. In most cases, for the vast majority of users, there will be only on target, Windows 8 or higher.

Next, Windows 8 will prepare itself for the purging process. Do note the somewhat confusing message about being plugged in. This refers to the power source, if you're running on a laptop. In general, whenever you're doing any system maintenance on any operating system, you should not work on the battery power.


And then, the actual refresh will begin. This can take a while.

After the Refresh process was complete, the system came up just fine. Indeed, it was restored to its original state, with all and any trace of my shenanigans gone. The feature seems to be robust and it's quite easy to use. There you go.
I have decided to be a news fanboy and start writing articles about new features implemented in the upcoming Windows 8. Pretty much everyone is doing it, so you may see a bit of regurgitated tech lingo here and there, although I will try to be both funny and original, while maintaining utter professionalism and keeping you informed. What more, I am sort of a Linux guy, which makes the me the best person to give you an objective report on the state of the new Windows.
Seriously, there are lots of interesting things coming in Windows 8 that we should talk about. Some are definitely overplayed, like the security, most of which you have already seen in my Windows 7 articles, one and two, but we might have another sequel. Then, there's the supposedly improved boot process, but that's for later. A new filesystem? Yes, please. Personalization, safe mode? Sure, we will discuss those, too. Today, we will focus on the new refresh/reset feature.
What is the refresh/reset?
The choice of words might be a bit tricky, but essentially, Microsoft want to make life easier for average users by giving them an option that OEM have been doing for years with Windows-based laptops - an ability to reset the system to factory settings, so to speak.
More advanced users will probably not be using the built-in system recovery mechanisms, as imaging sounds like a more flexible, more useful option. But then, even they might get lazy and choose the new stuff.
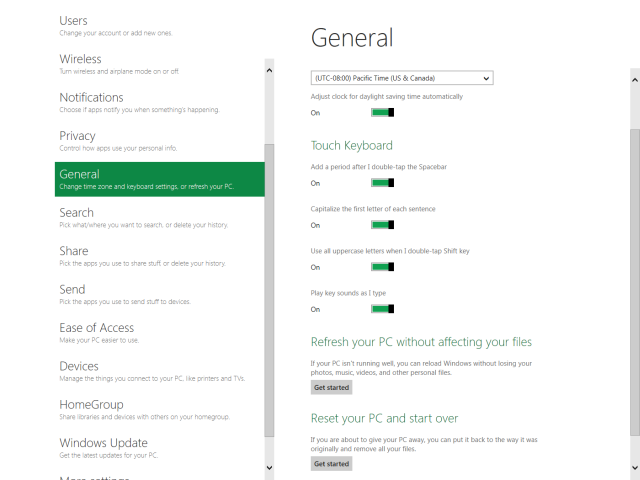
The two functions are available under Recovery in the Control Panel, using either the new interface or the old interface. However, you can only run them from within Windows if you have the Metro interface enabled, so please be aware of that. Now, this is nothing sinister, because you can toggle Metro on and off with a single registry key change and one login, no reboot required. Alternatively, you will need to fire up the recovery console during the boot and invoke the necessary functionality. You can also pop in the installation DVD and repair your system. The options are many and varied.
So let's open that menu. Let me show you both the new and classic Control Panel:

Refresh
Refresh is similar to booting into safe mode and trying to repair your Windows, using the sfc command on Windows XP, inserting your CD and then letting Windows fix corrupted system files by copying from the disc, or by using the recovery console in Windows 7, which then accesses the 100MB hidden partition where core system files are saved for emergency. Refresh is all of these combined.
It will let you reload core system files from its backup. Personal data will not be touched, although there is no guarantee that the repair process will work. So you are advised to keep your stuff on a separate partition and have a sound backup procedure in place. Imaging your system is also a wise choice, especially since you have a plenty of useful tools available, all for free. Lots of links on imaging further below.
You will lose programs installed manually. All your settings and tweaks will also be restored to default. So please think twice before you permanently refresh your system.
Reset
Reset is a more stringent operation. It is designed to truly reset your system to factory defaults, which, in this case, might be either a preinstalled setup or your own manual installation. Either way, you will lose all of your data and the system will go back to its pristine, fresh state.
This kind of operation might be desirable if you plan on giving away your machine with Windows installed, but you fear there might be traces and leftovers of personal data stored somewhere. Now, technically speaking, your data will still be there on the disk, only not accessible by the regular means of browsing using the Windows Explorer. So if you are keen on privacy, then you might want to consider a low-level format. We will have a separate discussion on this one soon.
What to choose? And when?
Now, the tough decision. Normally, if you are practicing safe and sane computing and do not abuse your system, you will probably never need to execute the Refresh option. In fact, you won't need ever fight BSOD, boot into safe mode, use the recovery console one way or another, or even invoke the system restore. All this assuming you behave.
If bad things happen, restoring your machine to a state that might have existed two years back or so could be painful. And the time you will need to get all your programs back might be equal to starting fresh and reinstalling from scratch. So you might be better of with system imaging, executed periodically before big changes.
The Reset sounds more useful, because it is more final. This is the kind of thing you will do when you no longer expect to continue running your system, so there should be fewer doubts about what might happen. Just remember that physical data might remain stored on the disk.
In action
Does this really work? Well, let's see. In my case, I deliberately borked a virtual machine, messing up the display by using incompatible 3D features in VirtualBox, which caused my test image to stop being usable. Then, I loaded the recovery console and started playing.
You will notice the new style and colors used. In all previous versions, Windows used a more classic recovery console. Here, it's inline with the new theme. The two dominant options are Refresh and Reset, but you can also do all the other things.
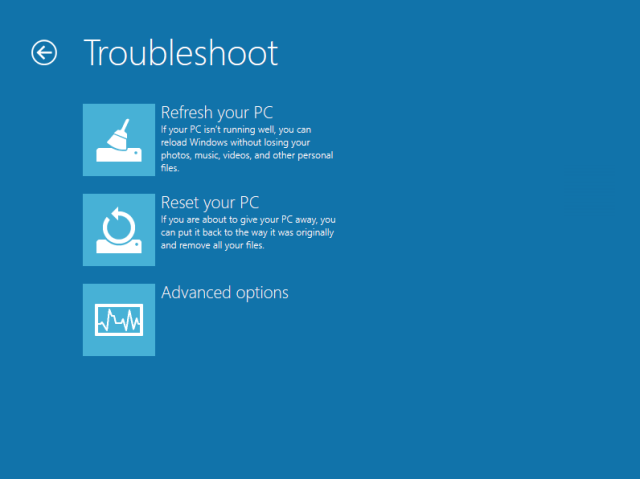
Since our system is no longer functioning, but we still supposedly need our data, we will try refreshing the host. This means we ought to go back to default system settings, with our personal stuff still intact. Windows Store apps will be kept, which is a nice thing.
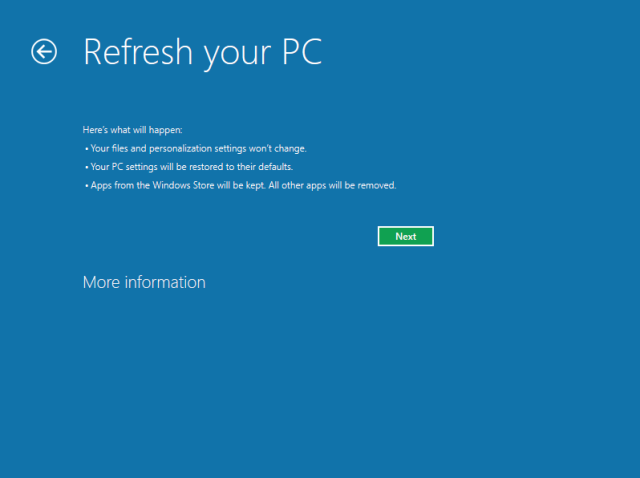
Your next step is to choose the target, if you have more than one instance of the Windows operating system capable of being refreshed installed on your disk. In most cases, for the vast majority of users, there will be only on target, Windows 8 or higher.
Next, Windows 8 will prepare itself for the purging process. Do note the somewhat confusing message about being plugged in. This refers to the power source, if you're running on a laptop. In general, whenever you're doing any system maintenance on any operating system, you should not work on the battery power.
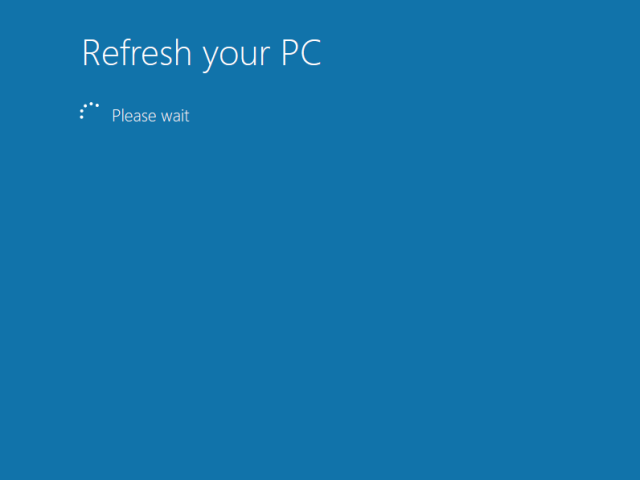

And then, the actual refresh will begin. This can take a while.
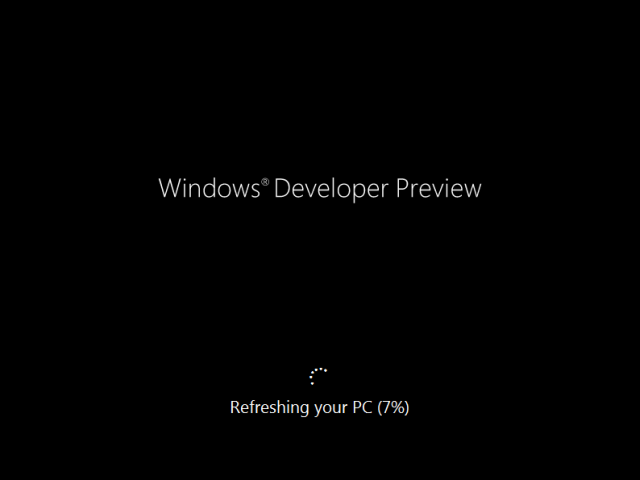
After the Refresh process was complete, the system came up just fine. Indeed, it was restored to its original state, with all and any trace of my shenanigans gone. The feature seems to be robust and it's quite easy to use. There you go.


