jamadari
JF-Expert Member
- Feb 13, 2010
- 295
- 92
There are many legitimate programs on your computer that are the cause for high CPU usage. However, there are also illegitimate programs such as spyware and viruses that can bog your CPU down by creating multiple processes that requires your computer resources.You can view the process and CPU usuage on your computer by using Windows Task Manager. Open up task Manager by pressing Crtl-Alt-Delete at the same time.

Its normal to have spikes in high CPU usage. However, if there is a constant trend of high CPU usage, this can indicate a problem. Windows Task Manger is a great tool to track CPU usage. In the Windows Task Manager, click the Performance tab. This will display your CPU Usage History.
As you can see, there is a fluctuation in the graph. This shows that my CPU is being used for everything from opening applications to simply moving the mouse. Programs running in the background can be the cause for high CPU usage peaks also. However, if your CPU Usage History shows little variation and is high.
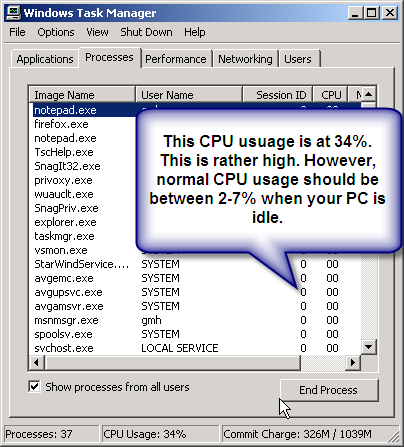
Its normal to have spikes in high CPU usage. However, if there is a constant trend of high CPU usage, this can indicate a problem. Windows Task Manger is a great tool to track CPU usage. In the Windows Task Manager, click the Performance tab. This will display your CPU Usage History.
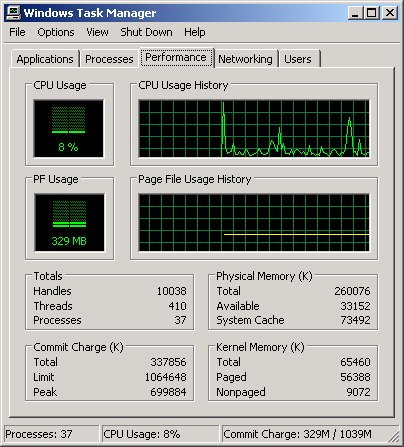
As you can see, there is a fluctuation in the graph. This shows that my CPU is being used for everything from opening applications to simply moving the mouse. Programs running in the background can be the cause for high CPU usage peaks also. However, if your CPU Usage History shows little variation and is high.
- How to stop the cause for high CPU usage
- Scan for Spyware or Adware--This is often the cause for high CPU usage. You should first scan your PC for these nasties.
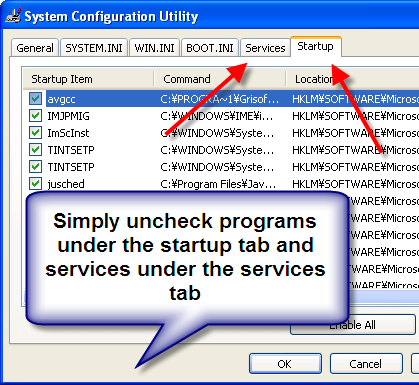
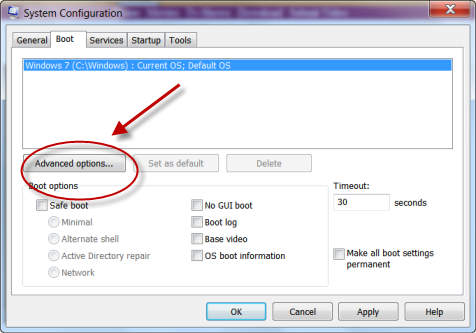
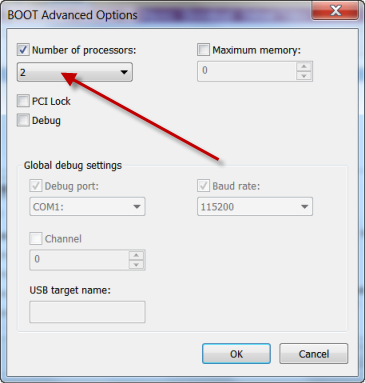
- Disable the amount of services running in the background-- You can do this by altering your computer configuration. Here is how:
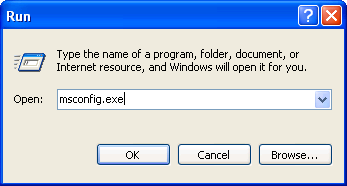
1. Open your Start menu.
2. Click Run
3. In the command screen type "msconfig.exe"
4. In the "system configuration utility",click either "service" or "startup" tab
5. Uncheck all programs that your are no longer using.
6. Click "OK"
Check out this link to find out which programs are necessary. - Cleaning your Registry-- You can free a massive amount of resources by repairing your registry. Often your computer uses processes to unsuccessfully repair your registry. Use a cleaner to repair it. This is a must!
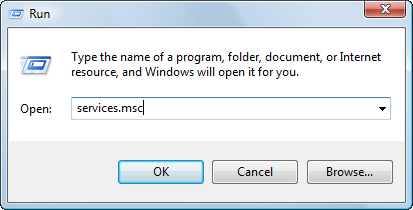
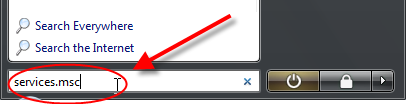
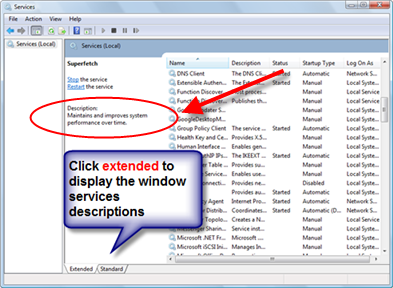
- Stop Svchost.exe-- This program acts as a host for many services on your computer. Its not a virus or spyware. It's necessary for your computer to function properly. However, you can stop the amount processes that are loaded. This will limit the need to for svchost server for loading. Here is one way to stop the svchost from loading:
In Windows XP
1. Click Start | Run (type) "services.msc" (no quotes)
2. Scroll down to "DNS Client", Right-click and select: Properties
3. Click the drop-down arrow for "Startup type"
4. Select: Manual, click Apply/Ok and restart.
(IF you are the only PC user, and not part of a domain.)
This also eliminates one of SVCHOST process in Task Manager. Remember this is only one way to eliminate the processes in svchost. You need to disable a list of unnecessary programs to limit the need to use svchost server. Click this link for a list of you can eliminate from your startup configuration.